Before you start, make sure you have all the necessary tools and materials. You will need a ladder, a tape measure, a level, a power drill, 3/16” drill bit, ¼” socket wrench or nut driver, hammer, and u-style gutter brackets.
Measure the length of your gutter and mark the placement of the brackets with a pencil. It is important to place the brackets at least every 2 feet to ensure stability.
Use the level to make sure the marks are level before you drill.
Drill pilot holes into the marks using the 3/16” drill bit.
Affix the brackets to the gutter using the ¼” socket wrench or nut driver.
Use the hammer to tap the brackets into place if necessary.
That’s it! Your u-style gutter brackets are now installed.
How do you install gutter support brackets?
Locate the point on the fascia board where the gutter support bracket will be installed. Mark the location with a pencil.
Drill a pilot hole at the marked location.
Screw the gutter support bracket into the pilot hole.
Repeat steps 1-3 for each gutter support bracket that will be installed.
How do hidden gutter hangers work?
A hidden gutter hanger is a support that is installed inside your gutters, out of sight. They are made of either plastic or metal, and are screwed or nailed into the fascia board. The hangers hook onto the front edge of the gutter and hold it in place.
Hidden gutter hangers are a great way to support your gutters without having unsightly brackets and hangers on the outside of your home. They are also less likely to come loose than traditional hangers, and can support more weight.
If you are looking to install hidden gutter hangers, you will need to purchase them from a hardware or home improvement store. They are relatively easy to install, but you will need a drill and some basic carpentry skills. It is also a good idea to have someone help you hold the gutters in place while you install the hangers.
Do gutter hangers go under drip edge?
The most common type of gutter hanger is the U-shaped hanger that hooks over the front edge of the gutter and then is screwed into the fascia board. These hangers are not installed under the drip edge.
How do you install gutter hanger straps?
Gutter hanger straps are an essential part of any gutter installation. Without these straps, your gutters would simply hang down from the roof, which would eventually lead to leaks and other damage. While the installation process varies depending on the type of gutter hanger straps you use, the general process is the same.
Begin by attaching the gutter hanger straps to the front of the gutter. Make sure that the straps are tight and secure before moving on.
Next, position the gutter hanger strap over the edge of the roof. Make sure that the strap is centered so that the gutter will be evenly supported.
Use a drill to screw the gutter hanger strap into the roof. Make sure that the screw is driven into a solid support beam to ensure a secure connection.
Repeat this process for each gutter hanger strap until the entire gutter is supported.
How far apart should gutter support brackets be?
Gutter support brackets should be placed every 32 inches on center. Most gutter support brackets come with pre-drilled holes to make installation easy. For extra support, brackets can be installed on the outside of the gutter as well.
What kind of screws do you use for gutter brackets?
There are a few different types of screws that can be used for gutter brackets, but the most common are hex head screws. These screws have a hexagonal head that can be turned with a wrench or a socket, making them easy to install. Another type of screw that can be used is a Phillips head screw. These screws have a cross-shaped head that can be turned with a Phillips screwdriver.
Last Word
There you have it! Our complete guide on how to install u style gutter brackets. If you follow these steps, you’ll be sure to have properly installed gutters that will protect your home from water damage.
How much should labor cost to install gutters? How much does it cost to install gutters per foot? Having seamless aluminum gutters professionally installed on your home will cost around $7 to $33 per linear foot. The average per-foot cost…
How do you install rain gutter hangers? 1: START 6 INCHES. Install the first hanger 6 inches from the end of the gutter or miter.2: SPACE 2 FEET. Hook the hangers into the lip of the gutter no more than…
Begin by measuring the area where the gutter brackets will be installed. It is important to ensure that the brackets are spaced evenly along the gutter.Once the measurements have been made, mark the placement of the brackets on the gutter.Using…
Begin by measuring the length of your gutter and cutting it to size.Next, mark the location of the hangers on the gutter.Drill pilot holes at the marked locations.Attach the hangers to the gutter using screws.Hang the gutter on the fascia…
Begin by measuring the length of your gutter and cutting it to size.Next, mark the placement of the brackets on the gutter.Finally, drill holes and attach the brackets using screws or nails. How do you install gutter support brackets? When…
Begin by measuring the length of your gutter.Cut your gutter to length, using a hacksaw or power saw.Install your gutter brackets at the desired intervals along the length of your gutter. Make sure to use brackets that are rated for…
Installing gutter brackets is a simple process that can be completed in a few minutes. The first step is to determine the location of the brackets. The brackets should be placed approximately four feet apart, with the first bracket being…
You will need a ladder, a tape measure, a level, a hammer, nails, and gutter brackets.Measure the length of your gutter and mark where you will need to place the brackets.Place the ladder at the mark and use the level…
When installing gutter brackets, the length of screws you'll need will depend on the thickness of your gutter and the material you're screwing into. For a standard 5" aluminum gutter, #8 x 1-1/4" screws are typically used. If you're attaching…
Begin by finding the center of your gutter and making a mark.Pre-drill a hole at the mark, using a drill bit that is slightly smaller than the diameter of your screw.Screw the bracket into the hole, using a screw that…
How far apart do you install gutter hangers? Hanger Spacing If you live in a warm area with less rain, then you should install your gutter hangers near the middle of the gutter every 24 inches or where there is…
Begin by measuring the inside of your gutter to determine how many brackets you will need.Cut your brackets to size, if necessary.Install the first bracket at the center point of your gutter.Measure and mark the location of the remaining brackets,…
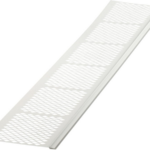
Installing K style gutter guards is a simple process that can be completed in a few steps. First, clean the gutters and downspouts to remove any debris or build-up. Next, measure the length of the gutters and cut the gutter…
K style gutter guards are a great way to keep your gutters clean and free from debris.To install them, start by measuring the length of your gutters and cutting the guards to size.Next, use zip ties or screws to attach…
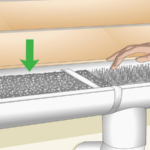
How should gutter guards be installed? Homeowners can install many types of gutter guards in or over the gutter. For a foam or brush gutter guard, place the product inside the gutter. For a mesh or micro-mesh screen, slide one…
How do you seal gutter end caps? Place your ladder below the broken or leaking end cap. Make sure your ladder is steady before proceeding.Check the problem area for damage. ... Clean the gutter of debris and old caulk. ...…