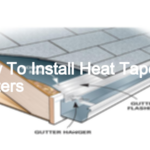
- Before installation, make sure the area around the gutters is clear of debris.
- Cut the heat trace cable to length, using a hacksaw or other suitable cutting tool.
- Peel back the adhesive backing on one end of the heat trace cable, and attach it to the gutter.
- Wrap the heat trace cable around the gutter, making sure to overlap the adhesive backing by at least 3 inches.
- Continue peeling back the adhesive backing and attaching the heat trace cable until the entire gutter is covered.
- Connect the end of the heat trace cable to the power supply, and turn it on.
- Monitor the gutters for any ice or snow buildup, and turn off the power supply when the gutters are clear.
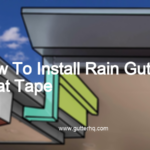
How do you install heat tape on gutters?
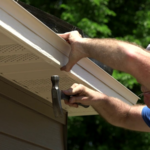
Installing heat tape on gutters is a relatively simple process. First, you will need to clean the gutters and downspouts to remove any debris that may be present. Next, you will need to measure the length of the gutters and downspouts to determine how much heat tape you will need to purchase. Once you have the correct amount of heat tape, you will need to cut it to length and attach it to the gutters using metal clips or zip ties. Finally, you will need to plug the heat tape into an outlet and turn it on.
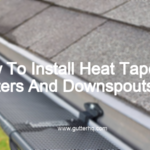
How should heat trace be installed?
In general, heat trace should be installed as close to the heat source as possible. This will minimize heat losses and help to prevent condensation. The heat trace should be installed on the coldest surface of the pipe to be heated. It is important to avoid installing heat trace on any surface that could be exposed to sunlight or other heat sources, as this could damage the heat trace.
How do you install a heat trace roof?
- Before starting any work, make sure that you have all of the necessary tools and materials on hand. This includes a heat trace roof, heat trace controller, power supply, and installation instructions.
- Carefully read the installation instructions that come with your heat trace roof. This will help you understand the process and ensure that you do not make any mistakes.
- Begin by attaching the heat trace roof to the power supply. Make sure that the connections are secure and that there is no chance of the power supply being disconnected.
- Once the roof is attached to the power supply, turn on the heat trace controller. This will begin the process of heating the roof.
- Monitor the progress of the heat trace roof installation closely. Once the roof is fully heated, turn off the controller and allow the roof to cool. This will complete the installation process.
Can you leave heat tape plugged in all the time?
Most heat tapes are self-regulating, so you can leave them plugged in all the time without worry. If you have a constant wattage heat tape, you may want to unplug it when the temperatures are warm and plug it back in when the temperatures start to drop.
How long does gutter heat tape last?
Gutter heat tape is a product that is used to help prevent ice dams from forming on your roof. Heat tape is placed in your gutters and then turns on when it senses that the temperature outside is below freezing. This helps to melt any snow or ice that is in your gutters and prevents it from refreezing and forming an ice dam.
Gutter heat tape will last for many years if it is installed correctly and maintained properly. However, there are a few things that can shorten the lifespan of your gutter heat tape.
One thing that can shorten the lifespan of your gutter heat tape is if it is not installed correctly. Heat tape needs to be installed in a way that it is not touching any metal surfaces. If the heat tape touches a metal surface, it can cause the heat tape to overheat and fail.
Another thing that can shorten the lifespan of your gutter heat tape is if it is not maintained properly. Heat tape needs to be checked regularly to make sure that it is still working correctly. If the heat tape is not working correctly, it can cause your gutters to freeze and form an ice dam.
If you follow these tips, your gutter heat tape should last for many years.
Final Talk
If you’re looking to install gutter heat trace, there are a few things you need to know. First, you’ll need to choose the right type of heat trace for your needs. There are two main types of heat trace – self-regulating and constant wattage. Self-regulating heat trace automatically adjusts its output to match the heat loss of the pipe, while constant wattage heat trace provides a set amount of heat regardless of the pipe’s heat loss.
Once you’ve chosen the right type of heat trace, you’ll need to install it properly to ensure it works correctly. This means running the heat trace along the length of the pipe and securing it in place. You’ll also need to connect the heat trace to a power source and insulate the pipe to prevent heat loss.
Installing gutter heat trace may seem like a daunting task, but following these simple steps will help you get it done quickly and easily.